Feeds:
Posts
Comments

Homemade bread

Growing up, I loved watching my mother bake. Whenever she poured cups of sugar into the mixing bowl, it almost felt like watching snow fall. As soon as I had the financial ability to buy myself some flour and baking tools, I started experimenting with the oven.

I started out with the recipes that seemed simple enough, such as chocolate chip cookies and banana bread. And I was able to get reasonably successful results, moving onto more challenging-looking recipes. The final results seemed good enough to move on: just like how I move onto the next piece of music on the piano after sight reading through it once.

Then, I faced a wall. A tall and thick wall called yeast bread.

Being the arrogant young home baker, I decided to challenge bagels. Little did I know how damn difficult it is to make bagels. Things were going fine until I started kneading. The stiff dough wasn’t getting any more elastic, like the recipe mentioned, and my wrists were starting to get a little sore. “This has got to work,” I thought to myself, refusing to accept the possibility of a miserable failure. I had been kneading for over twenty minutes now. The dough must have formed enough gluten bonds or whatever.

Sure enough, my pathetic rings of white dough didn’t rise at all in the oven. I could swear I followed the recipe to the period. But what I had after four hours in the kitchen were stiff flour rocks that couldn’t even get by as bagel chips.

After that, I tried several more times, praying for a loaf of soft, chewable bread out of my oven. Nope. My fifth or sixth attempted resembled bread, but it tasted like uncooked, dry dough in the center. I had no idea what the hell I was doing wrong. I just convinced myself that bread baking was a completely different category and not meant for everyone. Yup, I gave up: I scratched off home-baked bread of the list of things I could enjoy in life.

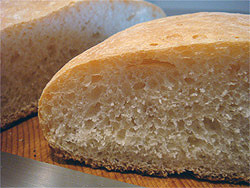
Then, on a humid summer day last year, I had this sudden urge to give it another try. It had been more than three years since the last attempt, and I didn’t even have yeast. After a quick trip to Whole Foods, I started putting together the dough and kneading. I had good feelings. And look what came out of the oven!

First success - Ciabatta

*congratulatory dance*

Ever since my first loaf of edible bread, I’ve been baking bread nonstop and even signed up for professional courses. I have learned so much from all the trials and errors, as well as the classes. For the next few posts, I’d like to share some of the tips so you can enjoy warm, fresh homemade bread in your own kitchen.

In this introductory post, I’ll go over the basic process of bread baking. I’ll cover each step in much more details in the following posts.

So let’s get started!

Almost every bread recipe will go through the following process:

Mixing & Kneading → First Rise → Shaping → Second Rise → Baking

Let’s take a look at what each stage is all about:

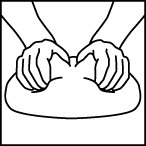
Kneading bread dough

Mixing & Kneading

Tasks are simple enough; you mix in all the ingredients and knead it for some time to get a ball of smooth, homogeneous dough. This step is to build a strong yet soft and elastic network of dough (technically gluten, flour protein, bonds) that would expand evenly and easily when the yeast starts producing gas. Think of it as making the materials for balloons; it should blow up easily without any holes or stiff spots.

First dough rise

The first rise

The bread would be dense and stiff if there was not much air inside. So we let the yeast do their work and release gas into the dough, until the volume doubles. There’s nothing else you do except leaving the bowl in the right temperature and humidity. However, this is only the first rise, meaning that you’ll deflate the dough afterwards; think of it as a warm-up session for “dough blowing” so it expands more easily later on.

Shaping bread dough

Shaping

After the first rise, now it’s time to shape the dough into a ball, spiral, etc. But before you do any rolling and twisting, the dough needs a little “bench time” (will discuss in depth later). Then you shape the dough into the final shape that will be inflated with the yeast’s gas. Because it will expand much more later, the initial shapes are much thinner and flatter than the final product.

Second dough rise

The second rise

Like the first rise, you let the yeast do its job to inflate the dough. This stage requires setting up the right temperature and humidity as well. The dough is let to expand up to about 80% of the final volume you’d like, since the yeast will continue to release gas up to the point of its death around 140F degrees.


Baking bread

Baking

Now it’s time to bake! You put in the inflated dough into the hot even, solidifying the dough into a brown, stable structure of yumminess. As mentioned above, the dough will continue to expand a bit more in the hot oven.

I’ll be posting about each step in more details. Please let me know if there’s anything you’d like me to add or fix in the articles!
Chocolate and orange

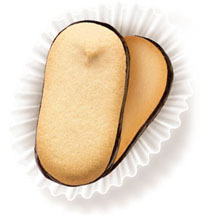
I love the combination of chocolate and any fruits: strawberries, coconut, bananas, and even dry mangoes. My favorite pair is chocolate and orange, though. Whenever I’m making chocolate chip cookies or brownies and I have an orange on hand, I’d take out my zester and sprinkle in a couple of tablespoons of the zest. I also used to be obsessed with the Milano cookies from Pepperidge Farm, especially the orange one:

Milano Cookies from Pepperidge Farm

Cute ad.

Pepperidge Farm's ad for Milano Cookies

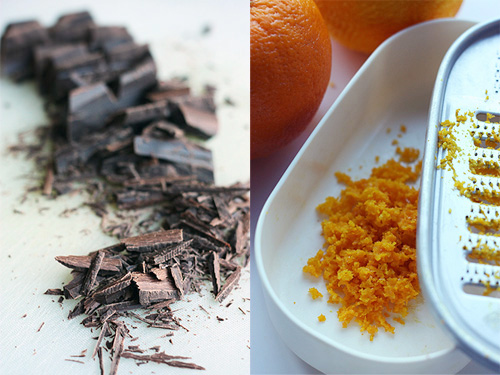
If you don’t have a zester, I highly highly recommend on getting one. It’s incredible what just a little bit of zest can do to your cooking and baking. The best zester I’ve ever used is the one from Microplane. For less than fifteen dollars, it made grating and zesting actually fun for me.

So here’s the recipe: not only it’s delicious and no-fail, but it’s also super easy. Three bowls — that’s all you need! (I even have one-bowl recipes.)

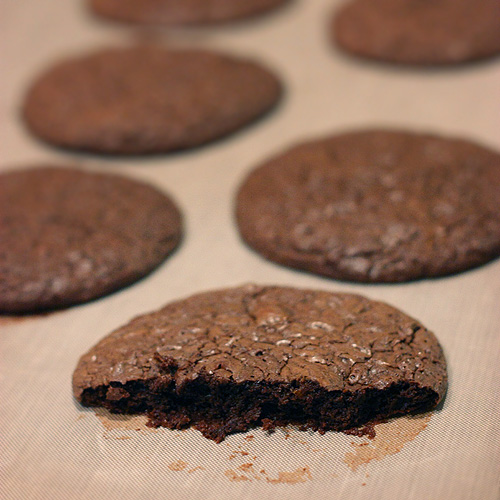
Soft chocolate cookies

Soft chocolate cookies with orange zest

Makes two dozens, 1.5″ wide

8 oz. (230g) of chocolate of your choice

1/3 cup (40g) of All-purpose flour (cake flour works fine)
1/4 tsp of Baking powder
A pinch of salt

Zest of One orange (or two if you’d like!)
Two Medium to Large eggs
1/2 cup (100g) of Sugar

A little butter for greasing

  • Preheat: 350 Fahrenheit (180 Celsius)
  • Bowl One: Melt the chocolate over a hot water bath.
  • Bowl Two: Sift the flour, baking powder, and salt.
  • Bowl Three: Cream the eggs and sugar. Mix in the zest.
  • Combine Bowl One and Three. Make sure the chocolate isn’t too hot. Whisk quickly.
  • Add Bowl Two to the mixture. Using a spatula, mix in the dry ingredients until just combined. Don’t overmix!
  • Drop by round tablespoon onto a slightly greased baking sheet and bake for 10-12 minutes. Don’t over bake if you want the soft texture.
  • Enjoy!

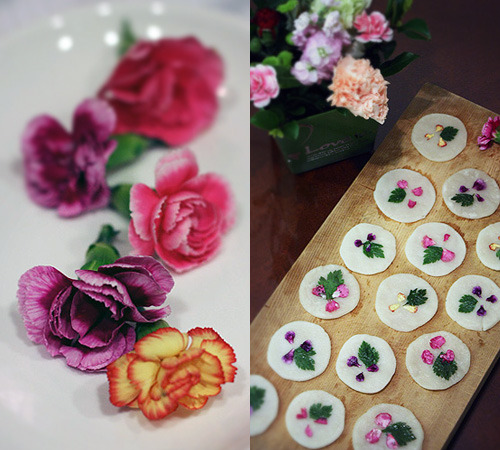
    Flower cakes with carnations

    May 8 is Parents’ Day in Korea. No separate Mother’s and Father’s Day. The tradition is to buy red carnations for your parents, and the streets get flooded with street vendors selling carnation corsages and baskets. It’s almost Koreans’ second nature to do so…this is what kids make in school every single year for the occasion. Repeat this for ten years; you feel extremely guilty if you don’t get carnations for your parents:

    Carnation by kids

    What they are going for:
    Carnation corsage

    Anyway, that time of the year came around again, and instead of making felt flowers or buying one of the baskets, I wanted do something a little bit more special for them. Something food related, of course. They have been incredibly supportive of me making a huge mess in their kitchen every weekend with the excuse of cooking for them. So I was delighted when I stumbled upon some edible carnations at a gourmet grocery store.

    Flower cakes with carnations

    Flower cakes, called Hwajeon (화전), are little round pieces of chewy, sticky mochi dough pan fried, which are then covered with thin syrup. It’s a very popular dish in the spring, usually topped with pink azaleas that are around only for a couple of weeks. Wikipedia page here. Try them out if you get your hands on a box of sweet rice flour, especially if you like chewy mochis. These are quite a treat.

    Flower cakes

    Hwajeon, “Flower Cakes”

    Makes a dozen 2″ cakes

    1 1/2 cups of Sweet rice flour, such as Mochiko flour
    3-4 tablespoons of hot water
    A pinch of salt
    Vegetable oil

    A dozen leaves of flat-leave parsley
    A few dozen petals of edible flowers

    1/2 cup of granulated sugar
    1/2 cup of water

    • Sift the rice flour and salt, then mix in the hot water a tablespoon at a time. When you have a slightly sticky dough, put it in a plastic bag and let it rest for 15-20 minutes.
    • Meanwhile, start making the syrup with the sugar and water. Do not stir. Put it on high heat until it starts boiling, then turn the heat down to low. Simmer until they appear just a tiny bit thicker. Turn off the heat immediately and let it cool.
    • Divide the dough into a dozen (or more if you want them smaller) and roll them into little balls.
    • Grease a flat surface with a little oil, then press them into flat discs, about 1/4″ thick. They will get slightly thicker once cooked. If there’s not enough oil, they will get stuck to the surface. Don’t stack them either.
    • Put the pan on very low heat. Coat with a little oil. Cook the discs for a few minutes on each side, until they become a little translucent. They will dry out if you overcook them.
    • Decorate the cakes with the leaves and petals while the cakes are still hot.
    • Place them on a plate and pour over the cooled syrup.

    In the Introduction post, I talked about why having control over your oven is critical to successful baking. Here are the actual tips now.

    Oven baking

    #1. Get to know your oven

    Unless you are an avid baker or a cook who spent a month over deciding which oven to buy, you probably haven’t paid too much attention to your oven. It’s generally simple enough for one to use it without a manual — you heat it, open it, stick your food in, then shut it. However, it’s important to know how your oven actually heats. Not all ovens heat equally, just like you don’t always fit into a medium shirt; sometimes you are a small, and sometimes you are a large. Same thing for the oven: the recipe might say preheat your oven for 20 minutes, but it may not be ready for another ten minutes; it says to place the pan in the lower rack, but your oven’s floor plate might be too hot.

    Although most modern models are, it’s also important to note whether it’s got a top broiler (so heat’s provided from the top too) and whether it’s a convection oven (comes with devices to circulate the heat more evenly). If it’s not a convection oven, you need to turn your pan around at least once to bake more evenly. I usually rotate mine three times.

    Probably one of the most debated oven topic is gas vs. electric. It’s simply the difference in the ways they are heated, but they can create a few major differences in the oven’s performance. Generally gas ovens are perceived to heat a little less evenly, have more temperature spikes, and generate more moist heat. On the other hand, electric ovens are perceived to heat more evenly, with more stable temperatures, and provide drier heat. Either should work fine, as long as you are aware of how it behaves when you bake. I personally prefer an electric one.

    #2. Preheat, preheat, preheat.

    I cannot say this enough: start your oven as you start mixing the batter (or as you prepare the dough for the second rise). The oven needs to be hot enough that it will still retain the heat when your batter goes in. If you heat it just enough that it reaches the desired temperature, it will lose the heat quickly during the few seconds you have it open. I’ve seen ovens that beep when it’s supposedly ready, but let it heat for another few minutes.

    A critical device when you are preheating: an oven thermometer. Don’t trust the beep or your intuition, and get one of the cheap ones (only cost $4). They work great. My oven has a built-in digital thermometer, but it’s often off by ten to fifteen degrees.

    Oven thermometer

    #3. What pan are you using?

    I used to never pay attention to the material of the pan I used. When I discovered a couple of Pyrex pans a few years ago in my parents’ house, I started using it a lot because they looked so pretty when done. However, soon I realized my brownies and pies were not turning out right and it would taking much longer to bake.

    There are three major types of baking pans you will see: dark metal, lighter and shiny metal, and glass. Oven is constantly turning on and off, trying to maintain the set temperature. Even though glass takes longer to heat up, it does a great job of holding a stable temperature and cooking more evenly, where as metal can get hot spots. However, because it takes longer to heat up in the beginning, glass may not be suitable for items that you bake at high temperatures for short times. Stick to cakes and brownies when it comes to glass pans.

    On the other hand, metal heats up more quickly, making it great for items like biscuits and cookies. Now, dark pans with a dull finish absorb heat faster than shiny ones which reflect it off. That means using a dark pan might burn the bottom of your cookies when the tops are not ready yet, in opposite to glass where the top might brown faster when the bottom is not ready. If that’s a frequent case for your glass pans, it could help to lower the temperature by 20 to 25 degrees and cook for ten to fifteen minutes longer.

    The new material, silicone, has gotten popular over the past few years. I haven’t tried it out much, but from others, it has gained popularity for easy removals and cleanups and there haven’t been any major compromises in terms of heat retention and even cooking.

    #4. Where to place your pan

    Usually the safe place is the bottom third, as the bottom takes longer to cook than the top, which could brown too fast if you place it too high. If you are sticking in multiple pans at once, rotate them as the pans at the bottom will not brown properly on top.

    Oven baking

    #5. Be quick!

    Whatever you do, whether putting in your pan, rotating, or giving it some steam, do it as quickly as you can so you lose the least amount of heat possible to prevent temperature spikes. Be ready to do whatever you do before you open the oven. I’ve witnessed too many cases where someone would leave the oven door wide open while looking for oven mitts.

    #6. Is it done yet? Is it?

    “Bake until done” is a very vague term. Some might like crispy cookies, where as some might like it softer. So your own judgement is the best call. But how do you tell?

    For cakes, bake until the center is set and golden. Insert a toothpick deep into the center to see if it comes off clean. If it does, it’s done. Usually the edges start to pull away from sides of the pan too. If you like your brownies and such a little gooey, however, take it out when the toothpick comes out with a little bit of moist better. It will solidify as you cool it on the rack. The same thing for the cookies — keep your eyes on the oven as the baking times are much shorter. The residual heat of the pan will keep cooking the cookies for another minute or two, so take it out when they look a little soft.

    For yeast bread, an instant-reading thermometer is your god. The general guidelines are crispy, golden brown surface, hollow sound when tapping on the bottom, etc., but when everything else looks perfectly done, the very center could still be gooey. The inside temperature should read 200 to 210 Fahrenheit degrees to ensure it’s actually done.

    Instant-read thermometer

    If it’s getting too dark on top but not done yet, there are a few things you can try: place it lower in the oven; or cover up the top with some aluminum foil; or lower the temperature a bit and cook for a longer period of time. On the other hand, if your cookies are brown on the bottom when they need to be cooked more, place them on the higher rack or double up the cookie pan with another.

    Most importantly, as mentioned in my earlier post, keep the oven shut to minimize temperature spikes.

    Timer

    #7. Cleaning

    Crumbs and spills left in the oven will turn into burnt black scums and gunk that are just impossible to clean up. But before you go scrub it down, know your oven type to prevent any damage. The most common ones are self-cleaning, textured, and regular, non-self-cleaning ovens.

    For the self-cleaning ones, run the cycle whenever you need to. Most spills will turn into piles of ash that can be easily cleaned with a damp dishcloth. Make sure you keep a window open during the cycle to let out the smoke.

    Textured ovens are continuous cleaning ovens, of which the specially designed surface burns off the residues as you to continue to use the oven. Just use a damp cloth to wipe it down. No oven cleaners or abrasive for neither of the oven types.

    Now what I have: regular, not-self-cleaning ovens. The best cleaning habit is to clean up any spills right after you finish using the oven. (when it’s cooled down of course!) Otherwise, you’ll have all sorts of burnt stuff stuck to the surface. Some lay a sheet of aluminum foil on the bottom — if you do that, make sure you aren’t blocking any vents. If you are itching to do a thorough cleanup, get some oven cleaner and a gentle scrubbing pad. Make sure you keep your window open too. If you are looking for less chemical-induced solutions, try baking soda or vinegar, mixed with some mild dish detergent. Spray some on and heat up the oven for a few, then when it’s cooled down, gently scrub and wipe it down. Repeat.

    Hope you find some of this helpful. And please share if you have any other tips! : )
    Not the state. Well, I wouldn’t know. I’ve never been.

    Le Alaska is a small bakery in downtown Seoul. A friend of mine from work recommended the place, raving about their croissants. Even though Korea has a ton of big brand “bakeries” that produce a serious amount of bread and pastries every day (one of them is called Paris Croissant, ha ha), they are neither fresh nor tasty in my opinion. All I taste is flat starch and sugar, nothing else. I had been craving some good bread and had to check out this place.

    To get there, I had to walk past blocks and blocks of high-end boutiques and cafes with marble walls and gold plated tea cups — which didn’t necessarily paint the right picture for this supposedly cozy place. But once I turned around the corner into a small alleyway, there was the bright yellow spot on the first floor of a red brick building, and all of sudden I was transferred to somewhere completely different, off of the busy, high-fashion grid of the city.

    Le Alaska in Seoul

    Their logo is a crown (or a guy?) decorated with loaves of bread. They apparently make everything from a baguette to a sandwich.

    Le Alaska's entrance

    The entrance was being guarded by a fuzzy sea lion. Cute.

    Le Alaska's sea lion

    The interior was soft-lit with lots of sunlight and I could see everything going on in their completely open kitchen. A guy was kneading some dough, and next to him a couple of ladies were busy whipping something. Right besides the kitchen, there were rows of yummy looking goodies.

    Le Alaska

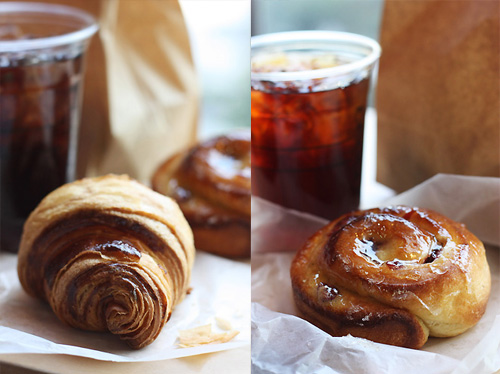
    I wanted to taste everything but obviously had to limit myself to a reasonable amount. It was really hard to decide, but after some deliberation, I left the place with a full bag of my final selections. And of course, couldn’t wait to get home and had to stop at a cafe to taste some of them.

    Croissant and Cranberry brioche

    The croissant was unbelievably flaky and light, perfectly buttery at every single layer. The glazed twisty brioche was super soft, almost like cotton candy, with bites of tangy cranberry pieces complimenting the sweet glaze. And overall, they both tasted incredibly fresh. There was this additional sweetness to the added sugar that made it stand out, almost like the difference between distilled water and chlorinated tap water.

    Bread eating continued back at home throughout the afternoon.

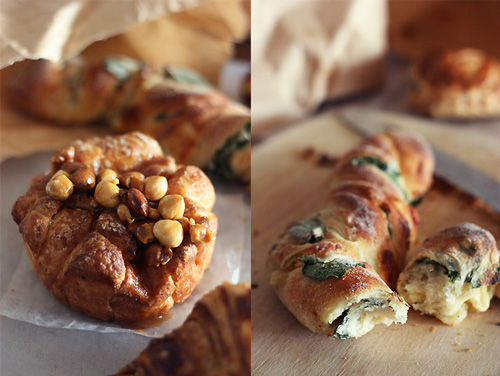
    More bread from Le Alaska

    Beautiful!
    Beautiful croissant

    Two favorites from the bag: The brioche with the nuts was the best one. I don’t know how the heck they do it, but the nuts were toasted to perfection, with the incredibly deep nutty flavor getting richer as I chewed on. (Reminded me of Wanka’s bubble gum with the ever lasting flavor) God, I can still taste the hazelnut in my mouth.

    Brioche and Spinach bread

    The two owners each graduated from Ecole De Pâtisserie De Tokio and Le Cordon Bleu’s Pâtisserie and Baking Program. After my first visit, I’ve gone back five times and sometimes they run out of bread by late afternoon. They also sell espresso drinks and fresh fruit juices. Prices run anywhere from 50 cents to three dollars — 700 to 3500 won in the local currency. Open daily from 9 a.m. to 10 p.m, closed on Sundays. The exact address is Shinsa-dong 653-9, Kangnam-gu, Seoul, and the phone number is +82 2 516-5871.

    And all gone before dinner. (My family helped.)

    Bread all gone


    I love exploring good eateries. I hate wasting an opportunity to eat out (and money) on mediocre places. Last night’s dinner was wasted on overcooked penne with watery tomato sauce that had maybe three pieces of eggplant at most. I finished it because I didn’t want to waste food. The dish cost me $21, too. Good thing you don’t tip in Korea, sigh.

    My date was to blame as he picked out the place with confidence, apparently having read all the raving reviews online. Since it was only our second date, I didn’t want to yet reveal my identity of a picky foodie who obsesses over fresh v. dry thyme and just smiled and nodded when he asked if my dinner was good. After a cup of bitter coffee and a slice of just-okay tiramisu at this really crowded cafe, again chosen by Mr. I-Love-Review-Sites, I was full and unhappy.

    When I got home, I got curious and looked up these places online. Both the restaurant and cafe had an average rating of four stars out of five as well as over a hundred reviews each. A number of other “foodies” were raving over the large portions, spectacular interior, friendly service, beautiful glassware, and cozy atmosphere. (Oh, some mentioned the “delicious food”.) Someone took off a star because the restaurant didn’t refill their bread basket. Someone added a star because they weren’t forced to order a dish per person. Someone took off a star because they wouldn’t take Visa. Hmm, where’s the conversation about the food?

    I do read on some of these review sites to find good places to eat. When I’m visiting California, I mostly look on Yelp. When I lived in Manhattan, I’d go on zagat.com or menupages.com, and even Citysearch if I got really desperate. But how helpful is all the information? When I think I’ve found a decent place, I’d see a reviewer who gave the place one star, saying how all the dishes were served cold and the waiter was unfriendly. Then all of sudden, I’m discouraged. I try another place, and among many praises, I read a couple of reviews that claim the portions are too small and the wait is too long. Along with all the noise, completely irrelevant to the actual food, now there are a lot of paid reviewers on these sites as well as individual blogs. Taste is a very subjective matter to begin with, but on top of it, now you could actually get false information.

    I do agree that the place’s price, service, wait time, portions, and all the rest shape your whole dining experience, but unless something is really worth noting, I simply don’t care. And even if something was really bad, like the waiter spilled the bowl of soup on your lap, it should not impact your star rating of the place since it’s most likely just your bad luck. I mean, I can’t imagine a restaurant where the waiters spill soup on every other customer’s lab. In my opinion, a restaurant should be rated and reviewed solely on its food. If you experience something else (usually service) that is great or horrible, a side note would be sufficient. Sure, there are places that constantly deliver poor service, but they are generally not the expensive, sit-down places and I don’t expect their full attention. There are places with sanitation issues too, but the food is never that great when you can’t keep up with the fundamentals of the kitchen anyway. If I don’t return to a place, it’s because the food is not worth it, not because of the slow waiter or the uncomfortable seat.

    Truly good food, the kind that makes me smile and say “Wow,” lets me forget about all the extra aspects of the restaurant. It’s only when the food is okay that I start getting distracted and paying attention to the interior or the waiter.

    When I write about some of my favorite eateries, I will be focusing on their food — its flavor, texture, ingredients, and such. If there is something notable, or a good story to tell, I will share it as well. But I will only be writing about those “wow” places, so it shouldn’t affect your decision. Just try them.

    Omelet
    The title is inspired by my recent obsession with Lee DeWyze’s version of Treat Her Like A Lady from this year’s American Idol. (It’s definitely one of my guilty pleasures, along with McDonald’s 2-for-99-cents apple pies.)

    As much as I love eating eggs, getting them right is one tricky business. Think about the stuff you do with eggs; cracking them with no bits of broken shells in the bowl; removing the bits if you failed to do so; frying them sunny side up without breaking the yolk; scrambling them and getting the texture right; boiling them with the yolks in the center; making an omelet with the filling actually inside the omelet; whipping meringue; and god, imagine poaching one. None of it is easy. Even cleaning a cracked egg on the counter is no piece of cake. (Any tips?)

    The reason they are so difficult to handle is that these thin shells full of slimy liquid (sound very appetizing) are very, very sensitive to pressure and heat. Let’s take frying an egg for an example. You drizzle a little oil over the skillet and wait for it to get hot. Hmm, seems pretty hot. You crack an egg open, and with a loud sizzle, the egg whites start bubbling up on the edges. Crap, a tiny piece of the shell got in there. While trying to pick it out with your fingers, only failing and getting your fingers slimy, the whites turn opaque and solid, and now you have to dissect your egg into pieces or forget about it. Okay, given up on the shell, you attempt to flip it to cook the other side, somehow keeping the yolk intact, all nice and liquidy. Oh gees, the egg is stuck to the skillet. You try scraping the bottom with the flipper, and it comes off after a few rough jabs…only with the runny yolk all over the skillet now. Frustrated, you give it a couple of more flips and quickly down the rubbery slab of white and yellow swirls (something like this) before anyone witnesses your complete lack of cooking talent — I mean, it’s supposed to be as easy as making a cup of noodles, right?

    Well, it’s not. Unless you are boiling them in water, eggs usually cook in a matter of seconds, and it requires a great deal of sophistication and speed to shape it the way you want. The bottom line is: they are sensitive and you have to be gentle and delicate.

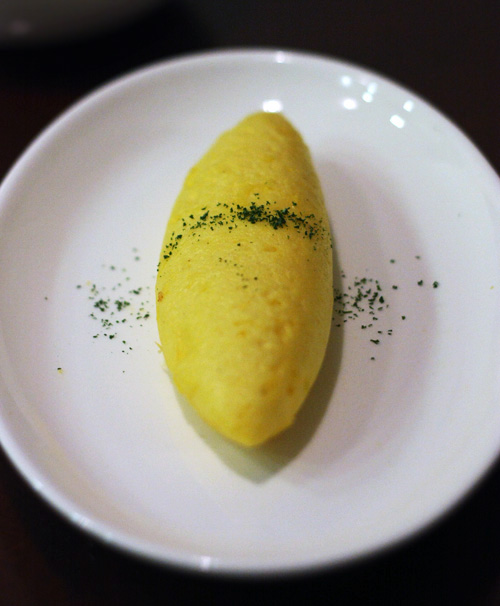
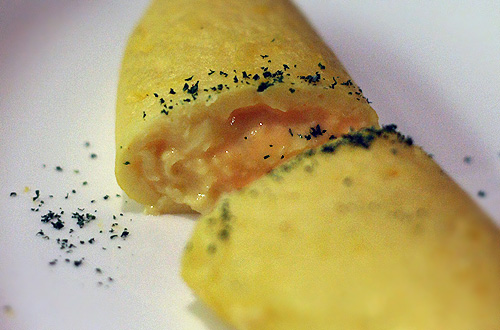
    Then how do you shape something like this French omelet?

    Omelet

    Whisk two to three eggs, then strain it through a fine strainer. This results in a smoother surface of the omelet. Mix in a tablespoon of cream or milk to soften it. Season it with salt and white pepper.

    Heat a well-coated 6 to 8-inch round pan over medium-low heat with half a tablespoon of butter and cooking oil each. If you use butter only, the butter will make it burn easily (unless you are using clarified butter). If you use oil only, the pan will be too slippery and you will miss out on the rich flavor. Make sure you grease the sides too, by the way.

    Turn up the heat just a bit, and pour in the egg mixture, reserving about a tablespoon of it. As soon as the edges start solidifying, scramble it into a chunky yet wet mixture. Thick chopsticks work amazingly well. You should be able to see the parts of it still runny and shiny. (If your heat is too low, your chunks will be too small and won’t give it enough volume. If it’s too high, it will be too dry to roll.) If the heat is too high and you see no runny parts, pour in the extra tablespoon you’ve reserved.

    Immediately turn down the heat to low. Using a spatula, gently shape the mixture into a flat oval and push it toward the edge of the pan, away from the handle. Tilt up the pan slightly with your left hand, holding the spatula with your right hand (or the other way around, however you like). Keep it tilted so that the edge curled up against the side of the pan cooks first. Once the very bottom solidifies, using your spatula, gently fold in the edge into a curve. Push the omelet towards the edge a bit further, from the opposite side. Fold in the edge once more. Now just pushing it from the other side will make it naturally curl in, but repeat curling if necessary. Repeat until it’s completely rolled into a long football shape. Keep tilting your pan back and forth, rotating the omelet gently, to cook it thoroughly without overcooking a single side.

    If you want to add filling, do it right after shaping the scramble mixture. Rather than just sprinkling it over, push it down a bit, as if you are tucking it in, to prevent it from falling out as you roll up the omelet.

    Now, shall we enjoy some cheesy cheddar goodness?
    Omelet

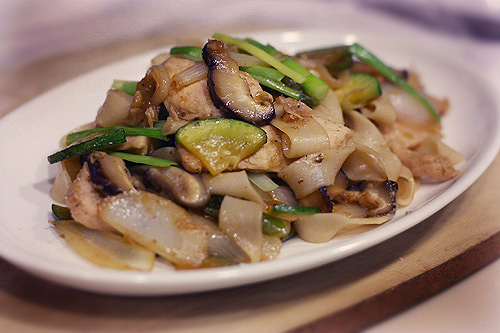
    Stir-fry noodle with Chicken and mushroom
    I’m not sure exactly how many hours I spend online everyday, but it’s a lot. Usually start with my email. Then I see a Facebook notification for me being tagged in a photo. I click on the link, check out the photo and decide to keep me tagged. Then I read through newsfeed. Someone posted a Youtube link. I laugh out loud at the hilarious video. Then I see more intriguing videos on the side. I click through some more, and move on to Twitter. Do a quick skim through all the tweets. Come across a tweet about German wines and freak out that I no longer remember whether Auslese means harvested later than Kabinett or not. Do a quick search online and read through all the relevant Wikipedia articles articles. Then someone IMs me. Oh, I also have to catch up on some of the blogs on Google Reader now…crap, now I’m either late to work, didn’t get my laundry done before bed, or just feel bleh from being on computer for so long.

    Same thing for my kitchen. As much as I love working in the kitchen, sometimes I have to hold myself back. Otherwise, it always turns out like tonight.

    Feeling hungry, I walked over to the kitchen. It was already past 8 p.m., and since I had made plans for some wine drinking around 10, I was going to do just something quick. I saw a bag of ramen in the cabinet. Hmm, what could I add to make it somewhat healthy. I opened the fridge and started going through it. Expired milk, chuck. (Damn, that bottle cost me $3.50.) Slightly moldy cheese. (Ugh, I hate a busy week when I have no time to cook.) Then I see half an onion. Also a plastic container of leftover zucchini and shitake mushroom. Score. Oh, and the chicken I worked on last night. Duh.

    Now I had a big pile of “extra” stuff on my counter, and it felt like a waste to contaminate them with dry instant noodles and MSG. Okay, let’s make some stir-fry. I chopped some garlic and ginger, mixed them in with soy sauce, sugar, lemon juice and black pepper. Marinated the chicken and mushroom in the sauce. Chopped the rest of the veggies.

    Then I realized I didn’t have rice. Do I have noodles? After going through the cabinets for a while, I found an almost-empty bag of spaghetti, but I didn’t want something like the “Shanghai Pasta” dishes they sell at the big-name family restaurants. (What a name. I hated the “Asian Salad” McDonalds carried for a while. Just because it had “Mandarin” oranges and some “Chinese” croutons? Give me a break.)

    All right, time to test how handmade noodles taste in stir-fry. I started mixing some flour and water to make the dough. Now it was almost 9 p.m., and I was supposed to be done with dinner half an hour ago and getting ready to go out. Oops.

    By the time I finished, I had to call up my friend and invite him over to finish the leftovers and drink wine in my PJ’s. I guess it turned out for the better in the end. And the dinner turned out tasty, especially with a glass of refreshing Riesling.

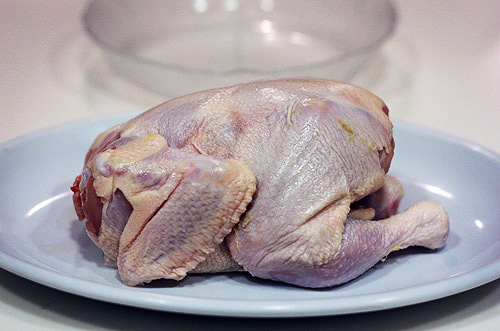
    Who knows why, but, last night, I felt like practicing deboning a chicken for my upcoming “Western cuisine” practical.

    A whole chicken, check. An empty plate for the bones, check. A sharp knife, check. (Not shown to keep my blog PG rated.) Target time, 15:00.
    A whole chicken

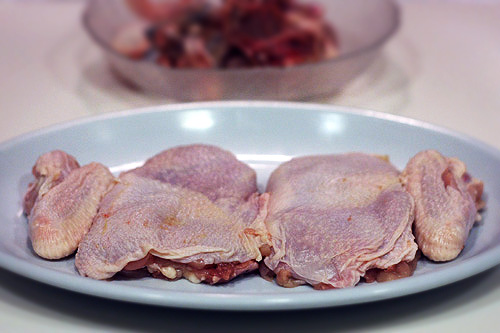
    Bam. My time, 13:42.

    Deboned chicken

    FYI, there are many other ways to do it. But I wanted to practice filleting the entire half a chicken without cutting off the thighs first. Here’s a great video I happened to find on Twitter, right after I decided to debone one. He does it in 5 minutes, of course, while pausing and talking too.

    More ducky photos

    By popular demand, here are the rest of the pictures from the Beijing Duck dinner:

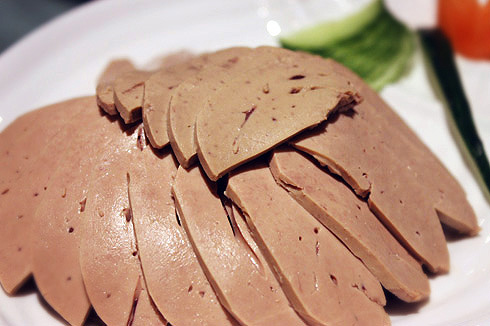
    Slices of duck liver. Tasted like other game livers I’ve had before. Very soft.
    Duck liver

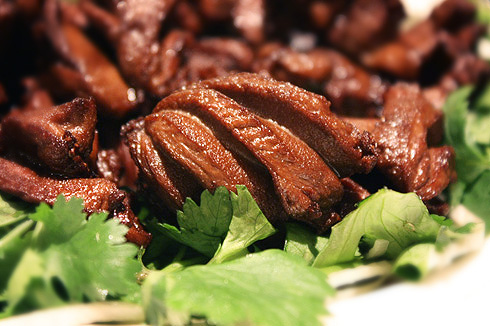
    Duck hearts. It was actually quite tasty.
    Duck hearts

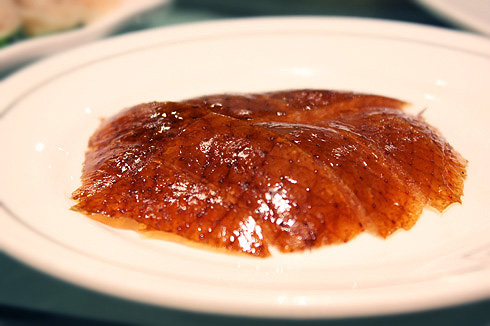
    Here’s a slice of the duck’s skin, with a layer of fat. Its flavor is incredibly rich (and very oily, of course). Quite a treat.
    Duck skin with a layer of fat

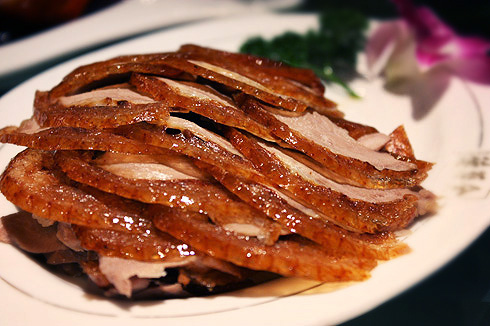
    Here’s the actual meat. They slice it with a pretty thick layer of skin attached, adding more depth to the taste.
    Beijing duck

    And…here’s the head. Click to enlarge, only if you really want to see it.

    Cooked duck heads

    By the way, the restaurant gives you a certificate for the duck you eat. It makes sense, since you’ll be leaving with the duck in its entirety in your tummy after the meal. I forget, but our duck was something like Duck Sold no. 1321057265981?